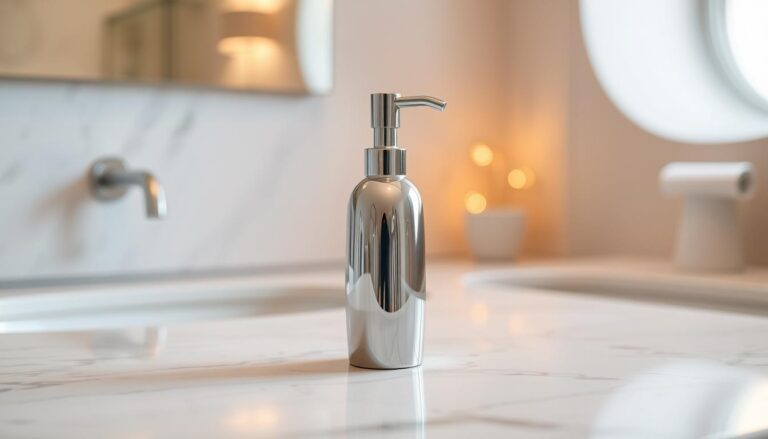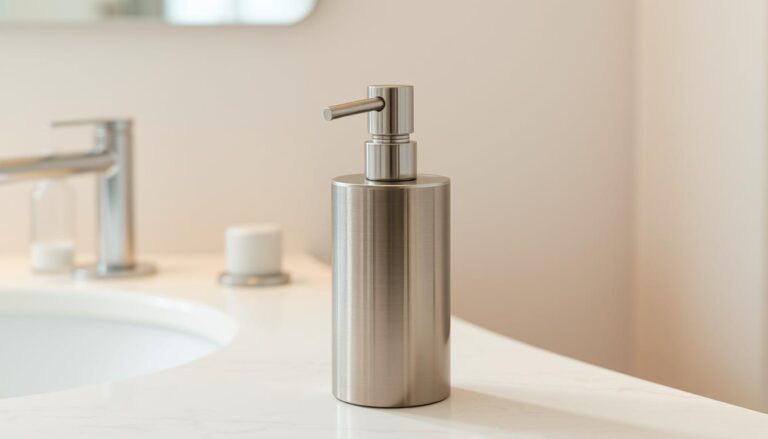
Installing a soap dispenser can enhance the functionality and hygiene of your bathroom or kitchen. A properly installed dispenser ensures easy access to soap, reducing clutter and mess. The Delta soap dispenser is a popular choice due to its durability and sleek design.
This guide will walk you through the steps to install your Delta soap dispenser correctly. With clear instructions and a few simple tools, you’ll have your dispenser up and running in no time. Proper installation is crucial for the dispenser’s performance and longevity.
Key Takeaways
- Understand the importance of proper soap dispenser installation.
- Learn the benefits of using a Delta soap dispenser.
- Follow a step-by-step guide for installation.
- Discover tools needed for the installation process.
- Ensure the longevity and performance of your dispenser.
Understanding Your Delta Soap Dispenser
Understanding the intricacies of your Delta soap dispenser is key to a seamless installation process. Delta offers a range of soap dispensers that are designed to work in harmony with their faucets and other bathroom fixtures.

Popular Delta Soap Dispenser Models
Delta soap dispensers come in various models, each with its unique features. Some of the popular models include those with touchless operation and designs that complement Delta’s line of faucets and other bathroom accessories. Choosing the right model depends on your specific needs and bathroom configuration.
Components and Parts Identification
Identifying the different components of your Delta soap dispenser is crucial for installation and maintenance. The main components include the dispenser head assembly, bottle, and mounting components.
Dispenser Head Assembly
The dispenser head assembly is the part that you interact with to dispense soap. It’s typically designed for ease of use and may feature mechanisms for adjusting soap flow.
Bottle and Mounting Components
The bottle holds the soap, and the mounting components secure the dispenser to your sink or countertop. Understanding how these parts work together is essential for a successful installation.
Specifications and Compatibility with Delta Fixtures
Delta soap dispensers are designed to be compatible with a range of Delta fixtures, ensuring a cohesive look in your bathroom. Checking the specifications of your dispenser and other Delta products will help ensure compatibility and optimal performance. For any queries or issues, Delta’s customer service is available to provide assistance.
“Delta’s commitment to quality and design excellence is reflected in their soap dispensers, which are engineered to provide years of reliable service,” as noted by a Delta design professional.
Tools and Materials Needed for Installation
Before starting your Delta soap dispenser installation, it’s crucial to gather all the necessary tools and materials. Having everything on hand will make the process smoother and more efficient.
Essential Tools for the Job
The following tools are essential for installing your Delta soap dispenser:
- Adjustable wrench: For tightening and loosening various parts.
- Phillips screwdriver: For removing and installing screws.
- Channel-type pliers (optional): For gripping and bending objects.
Optional Tools for Easier Installation
While not mandatory, these tools can make the installation process easier:
- Basin wrench: Useful for reaching and tightening mounting nuts under the sink.
- Teflon tape: Helps create a watertight seal on threaded connections.
Materials You May Need
Depending on your specific installation requirements, you may need:
- Plumber’s putty or silicone sealant: For creating a watertight seal around the dispenser.
- Cleaning supplies: To clean the area around the dispenser before and after installation.
Plumber’s Putty vs. Silicone Sealant
Both plumber’s putty and silicone sealant can be used to create a watertight seal. However, silicone sealant is more flexible and durable, making it a better choice for areas subject to movement or vibration.
Cleaning Supplies
Having cleaning supplies on hand, such as a damp cloth and mild soap, will help you clean the installation area and remove any residue or debris.

Pre-Installation Preparations
The key to a successful Delta Soap Dispenser installation lies in thorough pre-installation preparations. Ensuring your sink area is ready for the new dispenser not only simplifies the installation process but also guarantees optimal performance and longevity of the product.
Checking Your Sink Configuration
Before you begin, it’s essential to check your sink’s configuration. Verify that your sink is compatible with the Delta Soap Dispenser model you’ve chosen. Check the number of holes available and their spacing to ensure they match the dispenser’s mounting requirements.
Measuring for Proper Fit
Accurate measurements are crucial. Measure the distance between the mounting holes and compare them with the specifications provided by Delta. This step ensures a proper fit and avoids any potential installation issues.

Clearing the Installation Area
Clear the area around your sink of any clutter or obstructions. This will provide you with ample space to work comfortably and safely during the installation.
Safety Precautions Before Beginning
Take necessary safety precautions before starting the installation. Turn off the water supply to your sink and ensure the area is well-lit. Wearing protective gloves can also prevent injuries from sharp edges or tools.
| Pre-Installation Task | Description | Importance Level |
|---|---|---|
| Check Sink Configuration | Verify sink compatibility and mounting hole spacing | High |
| Measure for Proper Fit | Ensure accurate measurements match Delta specifications | High |
| Clear Installation Area | Remove clutter and obstructions around the sink | Medium |
| Safety Precautions | Turn off water supply, ensure good lighting, wear protective gloves | High |
Step-by-Step Delta Soap Dispenser Installation
Installing a Delta soap dispenser requires some basic tools and attention to detail, but the process is relatively simple. By following these steps, you can ensure a successful installation that provides years of reliable service.
Removing the Old Dispenser (If Applicable)
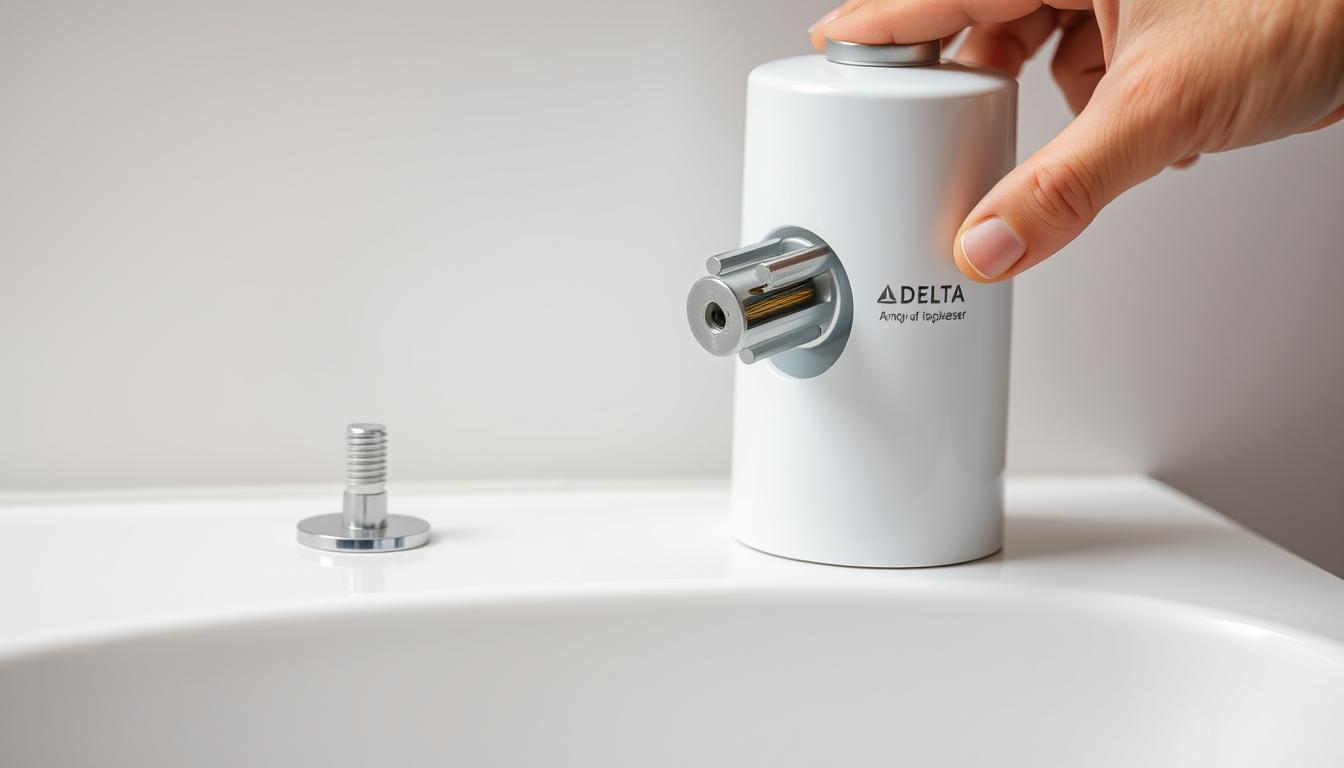
If you’re replacing an existing soap dispenser, the first step is to remove it. To do this, locate the mounting nut or clip that holds the dispenser in place. Use an adjustable wrench or basin wrench to loosen and remove the nut. Gently pull the dispenser out of the sink or countertop. If it’s stuck, you may need to use a bit of force or a tool like a flathead screwdriver to carefully pry it loose.
Preparing the Mounting Hole
The mounting hole is crucial for a secure installation. There are two scenarios: creating a new hole or using an existing one.
Creating a New Hole (If Needed)
If your sink or countertop doesn’t have a pre-drilled hole for the soap dispenser, you’ll need to create one. Measure the diameter of the dispenser’s mounting rod and mark the center point on the sink or countertop. Use a drill bit that’s slightly larger than the rod to create the hole. For granite or composite countertops, use a diamond-coated drill bit to avoid damaging the surface.
Cleaning Existing Holes
If you’re reusing an existing hole, ensure it’s clean and free of debris. Use a soft brush or cloth to remove any dirt or old adhesive. If the hole is too large or damaged, you may need to use a mounting kit that includes a larger gasket or repair the hole with a suitable filler material.
Installing the Soap Container
Once the mounting hole is prepared, insert the soap container’s mounting rod through the hole from underneath. Ensure it’s properly seated and aligned with the sink or countertop.
Securing the Dispenser Head
Place the dispenser head over the mounting rod and secure it with the provided nut or clip. Tighten it firmly to prevent leaks or movement. Be careful not to overtighten, which can damage the dispenser or sink.
Connecting All Components
Follow the manufacturer’s instructions to connect any additional components, such as the soap cartridge or pump mechanism. Ensure all connections are secure and not leaking.
Testing the Installation
Fill the soap container with the recommended type of soap and test the dispenser. Check for leaks around the mounting nut and ensure the dispenser pumps soap correctly. If you encounter any issues, refer to the troubleshooting section or contact Delta customer support.
| Installation Step | Key Considerations |
|---|---|
| Removing Old Dispenser | Loosen mounting nut, gently pull out dispenser |
| Preparing Mounting Hole | Create new hole or clean existing one, ensure proper size |
| Installing Soap Container | Insert mounting rod, ensure proper alignment |
| Securing Dispenser Head | Tighten nut or clip firmly, avoid overtightening |
| Connecting Components | Follow manufacturer’s instructions, ensure secure connections |
| Testing Installation | Check for leaks, ensure proper soap dispensing |
By following these steps, you can enjoy a functional and stylish Delta soap dispenser that complements your sink area. For more information on coordinating your soap dispenser with other Delta fixtures, refer to Section 9 of this guide.
Installing Delta Soap Dispensers in Different Sink Types
Delta soap dispensers are versatile and can be installed in different sink types, including stainless steel, porcelain, and granite or composite countertops. This flexibility allows homeowners to maintain a cohesive look in their kitchen or bathroom while enjoying the convenience of a Delta soap dispenser.
Installation in Stainless Steel Sinks
Stainless steel sinks are durable and resistant to corrosion, making them a popular choice for kitchens. When installing a Delta soap dispenser in a stainless steel sink, ensure the mounting hole is properly sized to avoid damaging the sink or the dispenser. Use a drill bit designed for metal to create a clean hole.
Installation in Porcelain Sinks
Porcelain sinks offer a classic, elegant appearance but require careful handling during the installation process. To avoid chipping the porcelain, use a gentle drilling technique and a drill bit suitable for ceramic materials. Ensure the area is clean and dry before proceeding with the installation.
Installation in Granite or Composite Countertops
Granite and composite countertops are popular for their durability and aesthetic appeal. Installing a Delta soap dispenser in these materials requires a diamond-coated drill bit to effectively penetrate the hard surface. Measure carefully to ensure accurate placement.
Special Considerations for Thick Countertops
Thick countertops, whether granite, composite, or another material, may require additional considerations for a successful installation. In such cases, using an extension kit can be beneficial.
Using Extension Kits
An extension kit can provide the necessary length to secure the dispenser properly in thick countertops. Follow the manufacturer’s instructions for installing the extension kit to ensure compatibility and proper function.
Adjusting for Proper Operation
After installation, test the dispenser to ensure it operates smoothly. Adjust the dispenser’s components as needed to achieve proper function, and verify that there are no leaks.
Filling and Maintaining Your Delta Soap Dispenser
Proper maintenance is key to ensuring your Delta soap dispenser continues to function smoothly. A well-maintained dispenser not only dispenses soap effectively but also remains a stylish addition to your bathroom or kitchen.
Recommended Soap Types for Optimal Performance
Choosing the right soap type is crucial for the optimal performance of your Delta soap dispenser. It’s recommended to use liquid soaps that are not too viscous or contain large particles, as these can clog the dispenser. Opt for soap that is compatible with your dispenser’s design.
Proper Filling Technique to Avoid Air Locks
To avoid air locks when filling your Delta soap dispenser, pour the soap slowly into the container. Ensure the container is held upright and that the soap flows freely into it. This technique helps prevent air bubbles from forming, which can disrupt the dispenser’s operation.
Regular Maintenance Tips
Regular maintenance involves cleaning the dispenser head and checking for any blockages. Use a soft cloth and mild soap to clean the exterior. For internal parts, refer to your user manual for specific instructions.
- Check and clean the dispenser regularly.
- Refill soap before it runs out completely.
- Inspect for any signs of wear or damage.
Seasonal Maintenance Considerations
Seasonal changes can affect the viscosity of the soap, potentially impacting the dispenser’s performance. During colder months, consider using a thinner soap or storing the soap in a warmer area to maintain optimal flow.
By following these maintenance tips, you can ensure your Delta soap dispenser remains in excellent condition, providing you with years of reliable service.
Troubleshooting Common Delta Soap Dispenser Issues
Understanding how to troubleshoot common issues with your Delta soap dispenser can save time and enhance your overall experience. Delta soap dispensers are designed for reliability, but like any plumbing fixture, they can occasionally malfunction.
Dispenser Not Pumping Properly
If your Delta soap dispenser is not pumping soap, there are a couple of potential causes to investigate. First, check for air lock problems.
Air Lock Problems
An air lock occurs when air enters the pump mechanism, preventing soap from dispensing. To resolve this, try pumping the dispenser several times to clear the air lock. If the problem persists, you may need to refill the dispenser or check for any blockages in the soap container or pump.
Pump Mechanism Issues
If the dispenser still doesn’t pump after addressing potential air locks, the pump mechanism might be faulty. Inspect the pump for any signs of wear or damage. In some cases, cleaning or replacing the pump mechanism can resolve the issue.
Leaking Problems and Solutions
A leaking Delta soap dispenser can be caused by a loose connection or a damaged seal. Check all connections between the dispenser head and the soap container, tightening any loose parts. If the leak persists, inspect the seals for damage and replace them if necessary.
Loose Dispenser Head Fixes
If the dispenser head is loose, it can lead to leaks or poor performance. To tighten it, locate the mounting nut under the sink and tighten it using an adjustable wrench. Be careful not to overtighten, which can damage the dispenser or sink.
Addressing Clogging Issues
Clogging can occur if the soap is too thick or if debris accumulates in the dispenser. To resolve clogging, try diluting the soap with water or cleaning the dispenser with a mixture of vinegar and water. Regular cleaning can help prevent clogs.
When to Contact Delta Customer Support
If you’ve tried the troubleshooting steps above and your Delta soap dispenser still isn’t working correctly, it may be time to contact Delta customer support. They can provide further assistance, repair options, or guide you through the warranty process if applicable.
| Issue | Troubleshooting Steps |
|---|---|
| Dispenser Not Pumping | Check for air locks, inspect pump mechanism |
| Leaking | Tighten connections, inspect seals |
| Loose Dispenser Head | Tighten mounting nut |
| Clogging | Dilute soap, clean dispenser |
Coordinating Your Soap Dispenser with Other Delta Fixtures
Creating a harmonious bathroom or kitchen design involves more than just selecting the right fixtures; it requires a thoughtful approach to coordinating your Delta soap dispenser with other Delta fixtures. This coordination is key to achieving a polished and stylish sink area.
Matching Finishes and Styles
Delta offers a variety of finishes, including Chrome, Brushed Nickel, and Oil-Rubbed Bronze, allowing you to match your soap dispenser with other Delta fixtures seamlessly. By choosing a consistent finish, you can create a cohesive look that enhances the overall aesthetic of your bathroom or kitchen.
Creating a Cohesive Sink Area Design
To create a cohesive sink area design, consider the style and finish of your Delta soap dispenser in relation to other fixtures like faucets and handles. Delta’s design philosophy emphasizes the importance of balance and harmony in bathroom and kitchen design.
Complementary Delta Products
Delta’s product line includes a range of complementary fixtures that can enhance your sink area’s design. From faucets to towel bars, Delta’s products are designed to work together to create a unified look. Consider pairing your soap dispenser with a Delta faucet for a seamless integration.
Design Tips from Delta Professionals
Delta professionals recommend considering the overall style of your bathroom or kitchen when selecting fixtures. For a modern look, consider Delta’s Touch2O technology, which offers a sleek and contemporary design. Additionally, joining the Delta Rewards program can provide you with exclusive design tips and insights into the latest trends.
Conclusion
Proper installation and maintenance are crucial for the optimal performance of your Delta soap dispenser. By following this installation guide, you’ve ensured a seamless integration with your sink configuration, whether it’s stainless steel, porcelain, or granite.
Now that your Delta soap dispenser is installed, you can explore other Delta products to create a cohesive sink area design. Delta offers a range of fixtures and accessories that can complement your new soap dispenser, enhancing both functionality and style.
If you’re a frequent traveler, you might also be interested in checking your Delta flight status for your next trip. Delta’s commitment to quality and customer satisfaction extends beyond its plumbing fixtures to its airline services, providing a consistent brand experience across different products.
By choosing Delta for your home and travel needs, you’re investing in reliability and excellence. Enjoy the convenience and elegance that Delta brings to your daily routine.
FAQ
What are the benefits of installing a Delta soap dispenser?
Installing a Delta soap dispenser provides a convenient and hygienic way to dispense soap, and its design complements other Delta fixtures, creating a cohesive look in your sink area.
How do I know which Delta soap dispenser model is compatible with my sink?
To ensure compatibility, check the specifications of your Delta soap dispenser model and compare them with your sink configuration, or contact Delta customer support for assistance.
What tools are required for installing a Delta soap dispenser?
Essential tools for the job include a screwdriver, wrench, and pliers, while optional tools may include a drill and silicone sealant for easier installation.
Can I install a Delta soap dispenser in a sink made of any material?
Delta soap dispensers can be installed in various sink types, including stainless steel, porcelain, and granite or composite countertops, but special considerations may apply for thick countertops.
How do I troubleshoot a Delta soap dispenser that is not pumping properly?
Check for air lock problems or pump mechanism issues, and refer to the troubleshooting section for solutions, or contact Delta customer support if the issue persists.
What type of soap is recommended for use with Delta soap dispensers?
For optimal performance, use soap that is compatible with the dispenser’s design and recommended by Delta, and follow the proper filling technique to avoid air locks.
How do I coordinate my Delta soap dispenser with other Delta fixtures?
Match the finish and style of your Delta soap dispenser with other Delta fixtures, and consider complementary Delta products to create a cohesive sink area design.
What should I do if my Delta soap dispenser is leaking?
Check the dispenser’s connections and seals, and refer to the troubleshooting section for solutions to leaking problems, or contact Delta customer support if necessary.
Can I use Delta’s customer support for issues related to Delta flights or Delta Skymiles?
No, Delta’s customer support for soap dispensers is separate from their customer support for flights and Skymiles; for flight-related issues, contact Delta Airlines customer support directly.